While this isn't dedicated to any particular gear or pedal this is a log dedicated to the modifications I have recently made for this experience to be as portable as possible. Up to this point, the base models for the experience of creating music and thus playing this music live has been on the TRS-80 Models 3 and 4. They have a nice classic all-in-one look that I really enjoy as one of my favorite computer designs and the look definitely appeals to others especially at music shows.
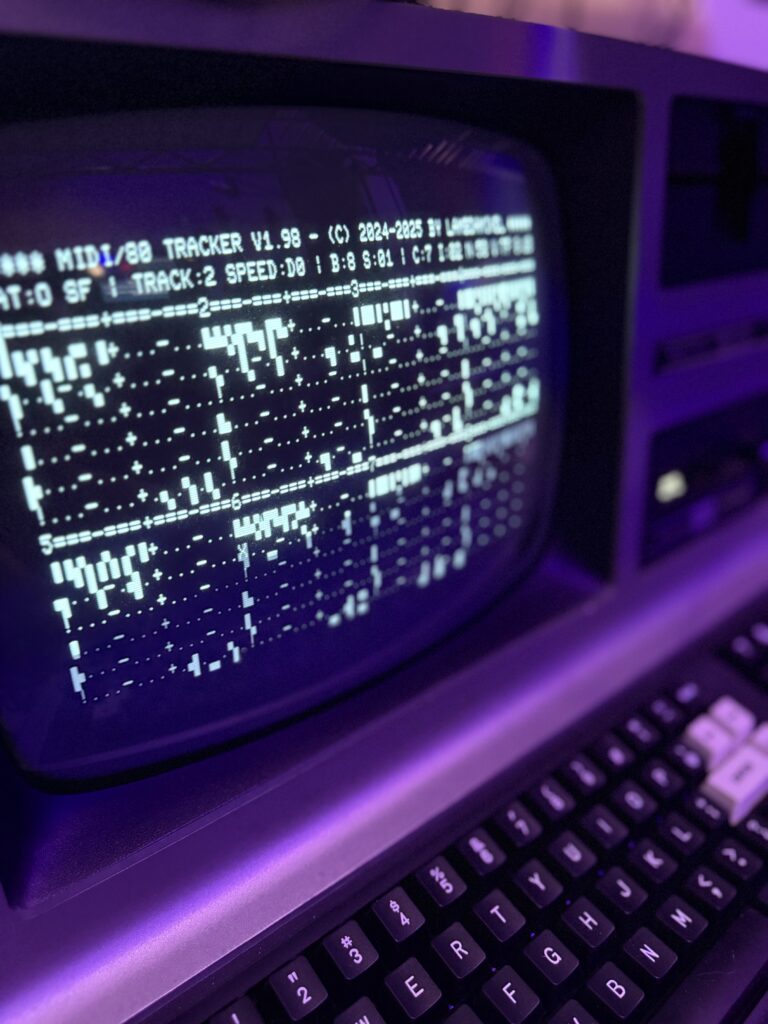
Model III Microcomputer with TRACKER pattern displayed on the screen.
This is all fun and good, until it's time to setup and take down among other musicians and bands. I'm no authority when it comes to this business but I build on my knowledge from my 10 or so years experience building and playing in a band in the early 2000s.

Bottom line_______ - shows need you (and your shit) in and out fast.

So the time came now that the machines proved themselves to make some changes to help speed up setup/tear down and also make transport easier on the heart. We are dealing with real 40+ year old machines.

The first thing that we could do was change out the Model III and Model 4 Desktop Micros' for their successor and last of the line in the Z80 Tandy Radio Shack computers, the Model 4P.

After all, Why Not? It's in the name of the damn computer itself! The Model 4P (for Portable) is the almost identical twin to its desktop model- just overly engineered into a plastic transportable case that actually used to meet carry-on requirements for air travel!

The fellas over at Tandy Radio Shack made two different models of the 4P and both are used in this rig. They have a smaller 9" CRT display, two floppy drives, 64/128k RAM, 4 MHz Z80 CPU and feature the same function as the desktop models, sometimes even faster with 0 wait states.

What this means is the 4Ps are significantly smaller and more transportable than the desktop units and even better fit just inside of the typical 19" rack. Having been inside these before with the 4P being one of the first systems I acquired, I was familiar with how the structure of the machine was setup and had some ideas on how we could do this.
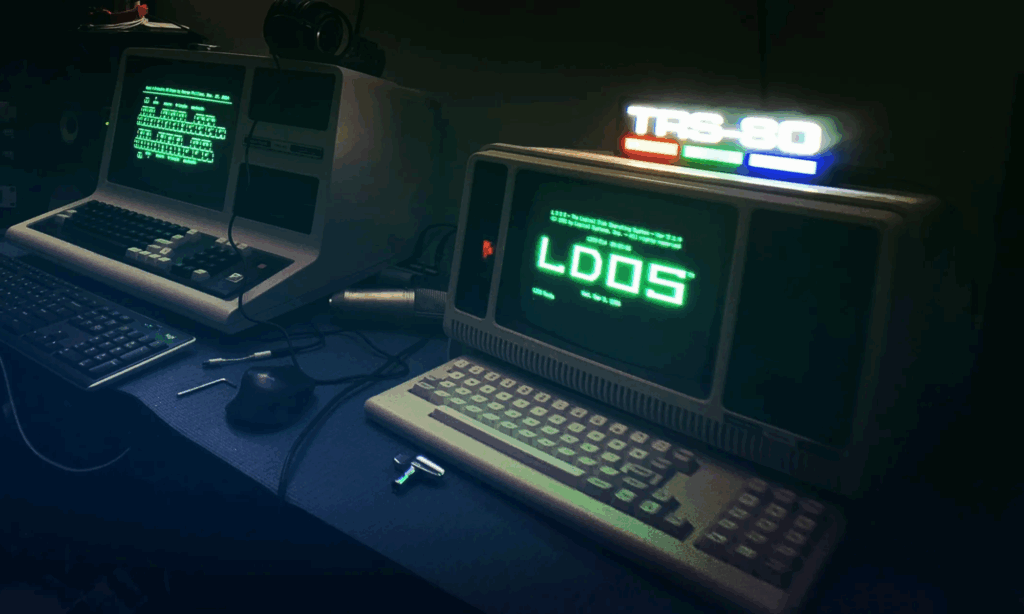
Model 4 and the Model 4P
I went through a few design ideas in my head considering the following:
Weight: ~26lbs. Hight: 8.5" in the plastic case Depth: 14" out of the plastic case Width: 17" out of the plastic case
SKB 12U inside rack mountable height came to just under 21" of vertical rack space- and would be dedicated to the computers- Other outboard gear would have to live in a separate rack for the time being.
Some modifications were going to have to occur for this to work...
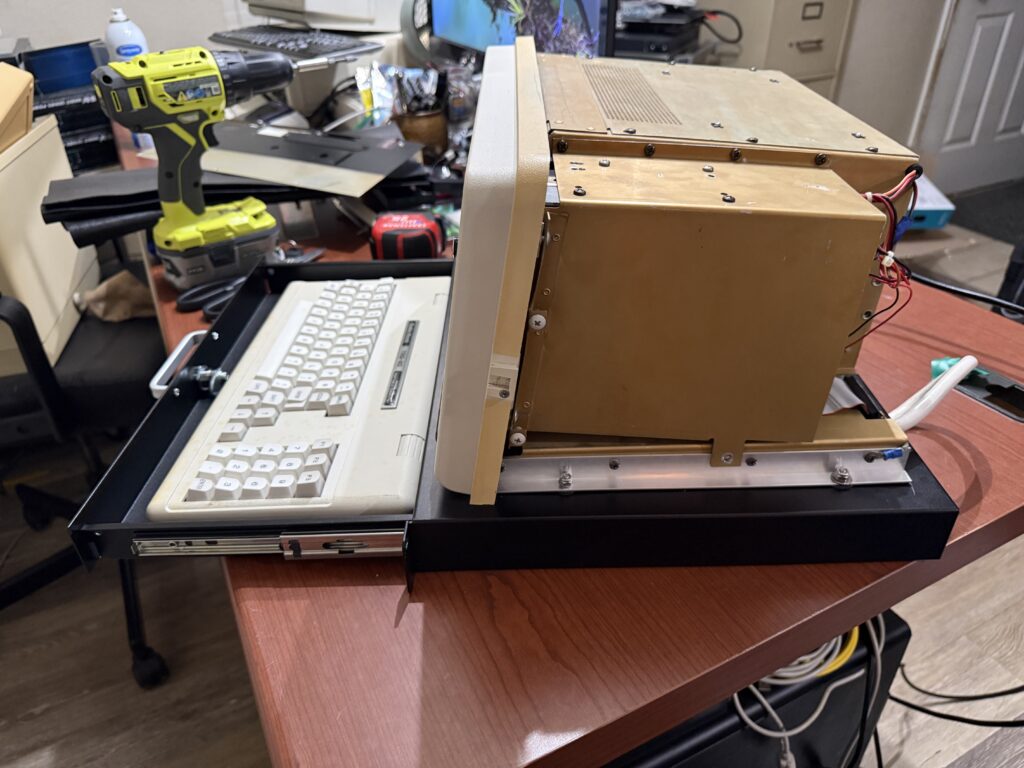
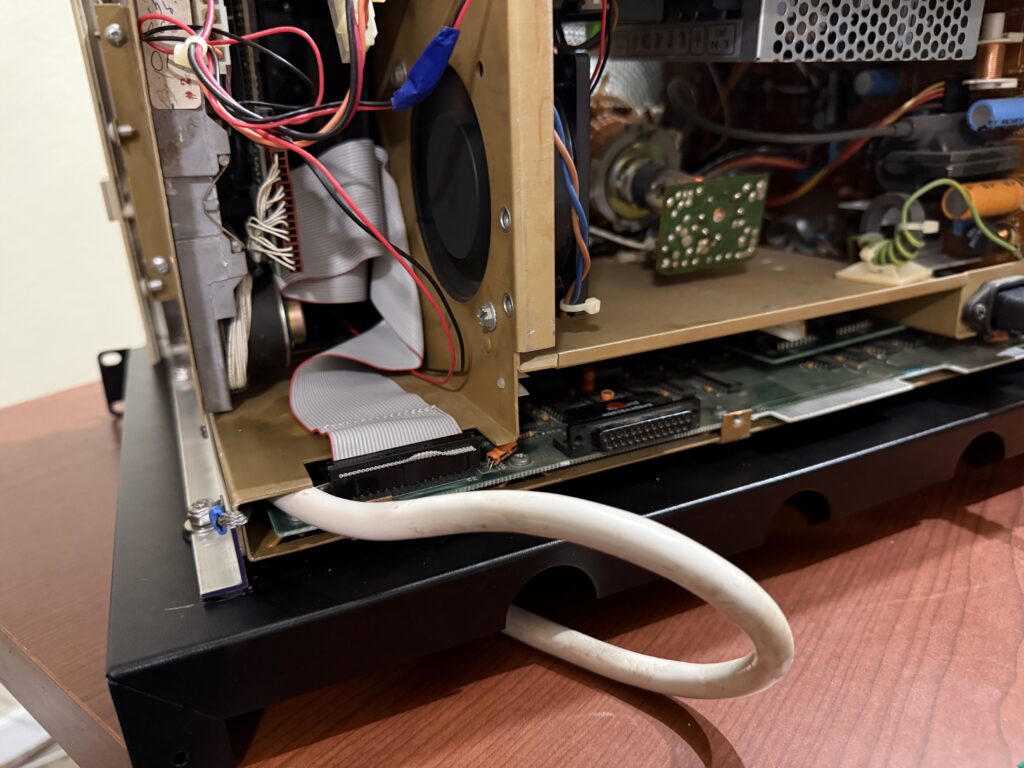
The first order of business in this process was ensuring the 4Ps were ready for the show. This meant new modern quiet and cool switchingpowersupplies in both machines, pulling the Tandon TM-50 floppy drives and replacing them with Gotek Floppy Emulators (FME).
After removing the one of the floppies and swapping out the PSU with a lighter weight modern unit, we were able to get the weight down to ~22 lbs which was just over the limit of the drawer selected for the job. After looking at how the system cools and knowing the chassis inside is the actual structure of the machine removing the plastic and rear handle took it below the drawers weight limit and actually opens the internal case to more airflow.
Plastic Case & Removable Cover: −6~ lbs. Tandon TM50 Floppy Drive: −2~ lbs. Power Supply Swap (Original to RT-65B): ~1.5 lbs. Rear Handle Assembly: ~0.3 lbs. Final Weight per Unit: ~16 lbs. (well below the 22lb capacity).
With the machine mounted to the drawer- each units height comes in at 8.5". 9" per unit is the space I have and I managed to meet it with just under 1/2" to spare.
I purchased a couple feet of aluminum angle offset from the hardware store with a slightly taller side to create a mounting frame for the TRS-80 metal chassis to sit in and give a slight 1/8" gap between the main logic board and the rack drawer. Along each side of the computer are 4 screws that hold the main logic board together- utilizing those screws I mounted the chassis to the drawer by drilling and installing stainless bolts with rubber grommets between and secured the rails to the drawer using lock-nuts.

After the case was mounted, the only other issue was moving the keyboard cable exit from under the chassis to behind so it can enter the back of the drawer. This involved using a grinder attachment and carving out a small 1/2" notch into the back metal panel for the cable to exit without issue. I added a few layers of electrical tape to the roughed surfaces to try and prevent any cable sheer or damage, and it seems to work.
The largestofconcern when doing this is making sure the grounding strap for the keyboard stays stretched along the inside of the chassis and not allowed to stray near the main logic board- or risk of direct short to ground. Thankfully the grounding strap reached the outside screw and keeps it perfectlywedged in the upper corder of the chassis with the large keyboard cable in between.
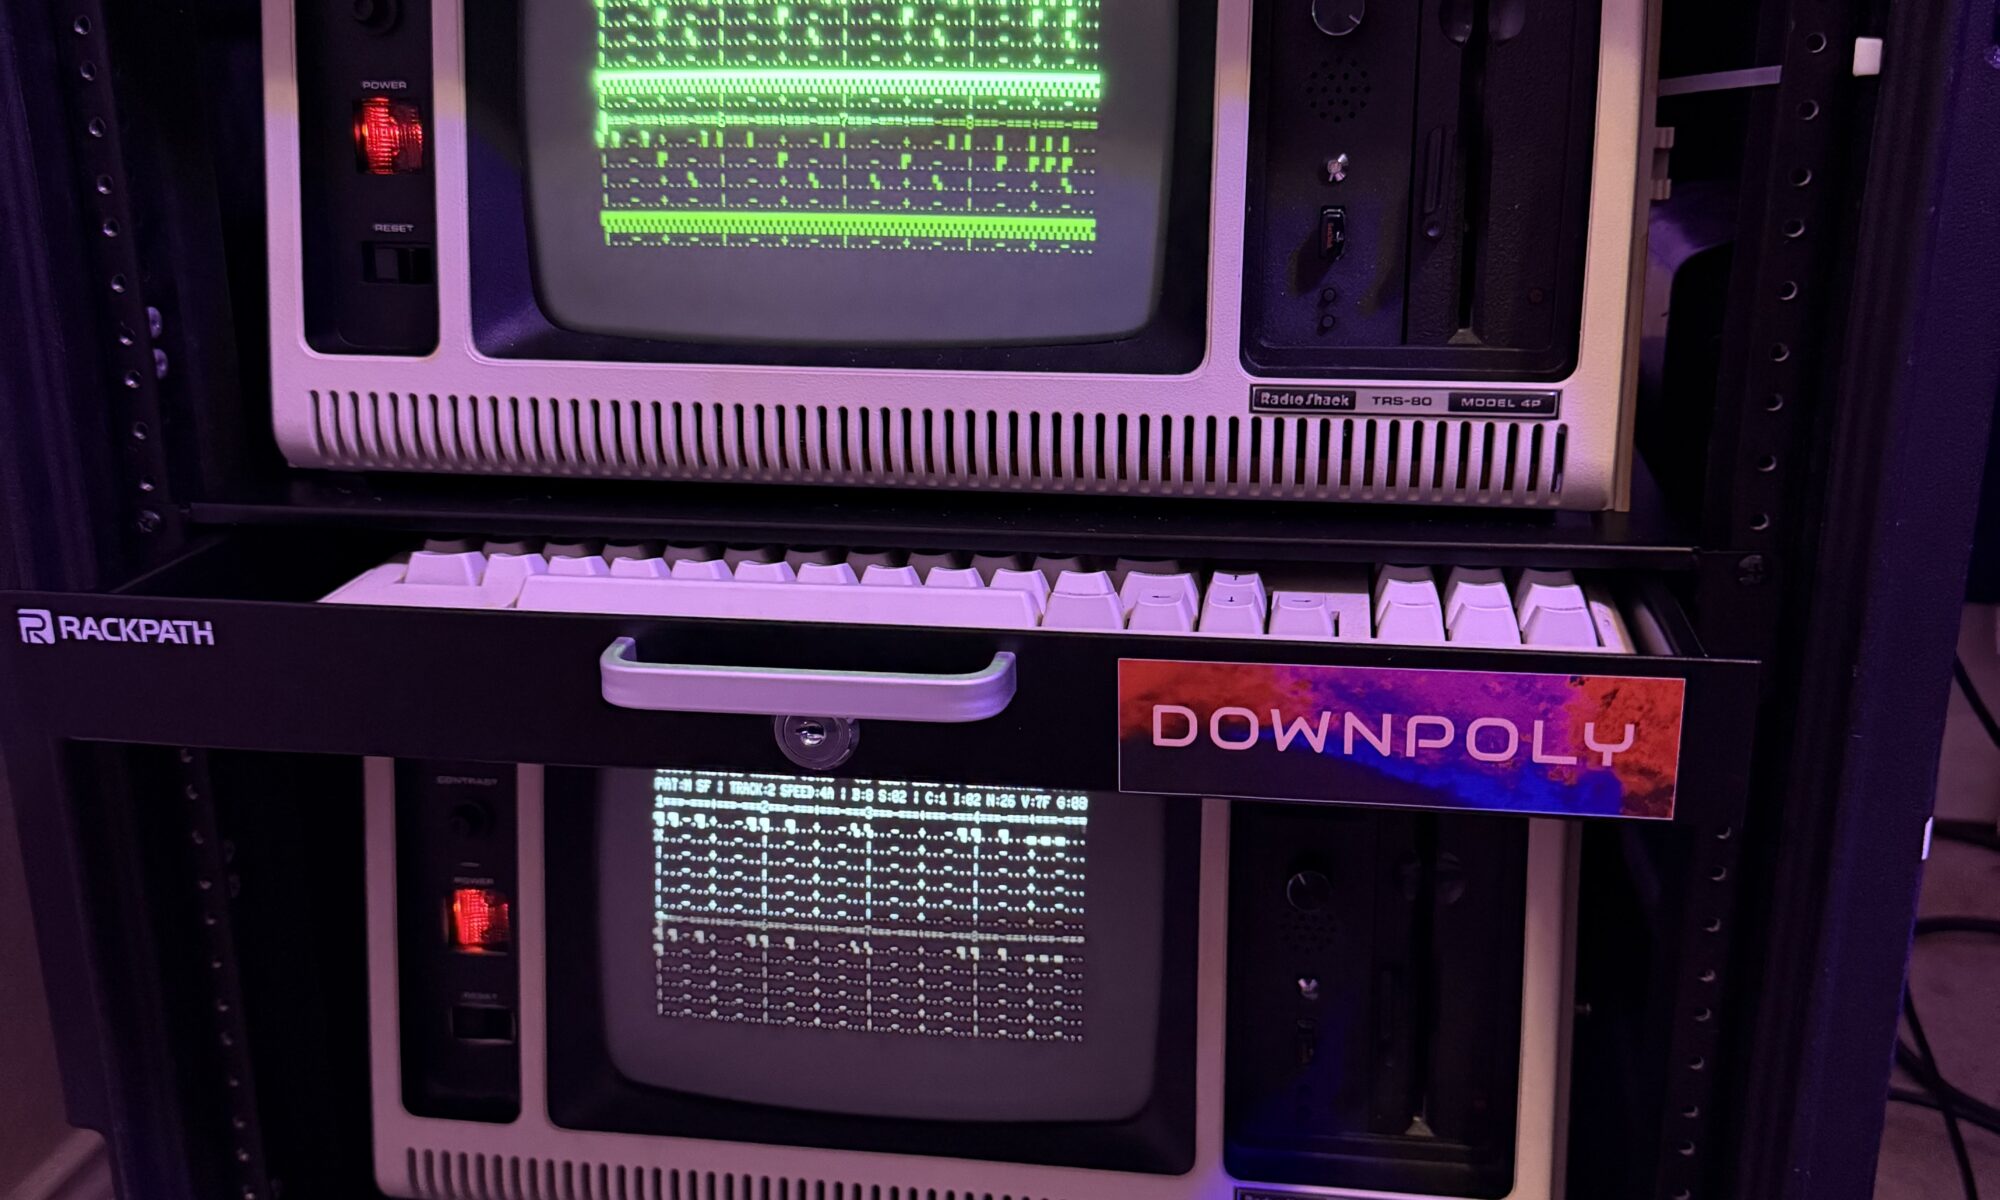
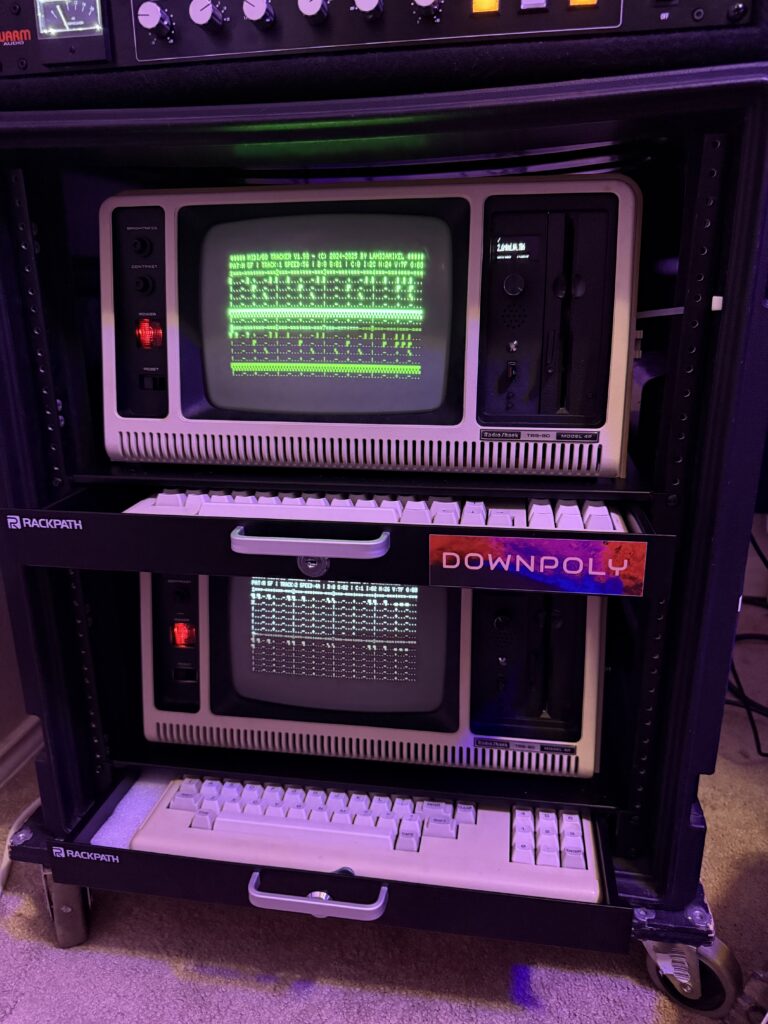
2 TRS-80 Model 4Ps rack mounted vertically.
Installing them in the case worked as planned, there is just about 1/4" of space between the units at the front, and due to the taper of the chassis without the plastic case, the space in the back is even greater at around an inch. To help stabilize the top drawer since it only mounts at the front- I used a simple 19" rack tray mounted upside down to help lift the rear of the top mounted unit.
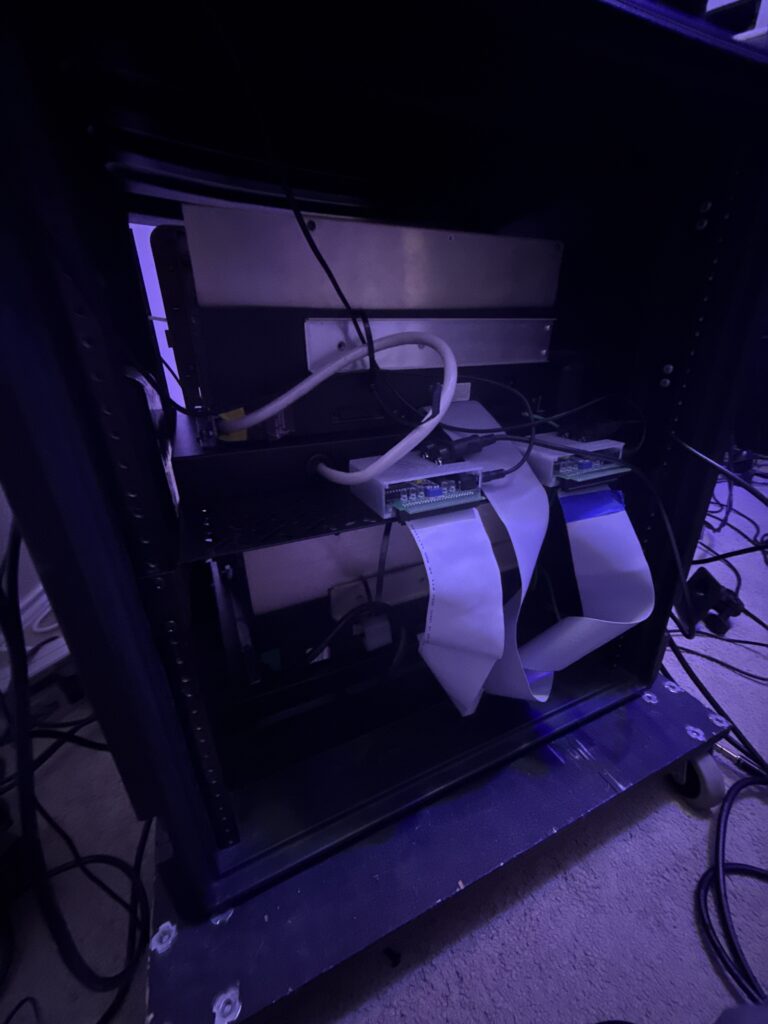
This also provides space to mount the MIDI/80s in with the systems now without having to unplug and pack them away.
While the lighting isn't the best here, you can see the two MIDI/80s on the shelf keeping them secure and safe, making tear down and setup so much easier and faster now.
Improvements like this will help me bring Downpoly to more music venues and make the computers more music show friendly while keeping them safe and secure. Thanks for reading, hope you enjoyed this log and the Music I create with these machines!